TA的每日心情 | 奋斗
10-3-2016 09:18 |
|---|
签到天数: 8 天 [LV.3]偶尔看看II
|
 发表于 2-1-2016 09:15:55
|
显示全部楼层
发表于 2-1-2016 09:15:55
|
显示全部楼层
PRODUCT
DATASHEET
#57006 rev 2.0
MoTeC Pty. Ltd, 121 Merrindale Drive, Croydon South, Victoria 3136, Australia
www.motec.com, Ph 61 3 9761 5050, Fax 61 3 9761 5051, support@motec.com.au
Configuration in ‘hundred
series’ ECU
Procedure described for Version 3 software.
Configuration in Version 2 software is similar.
1. On the Adjust menu, click Sensor Setup
and then Input Setup.
 Double-click the Lambda 1 (La1)
channel and in the Input Source box,
select Lambda 1.
 Click Predefined, select #38
Lambda Internal LSU or NTK and
click OK twice.
2. On the Adjust menu, click Sensor Setup
and then Wideband Lambda Setup.
 Click Sensor Type and enter 7 (LSU
4.9 Normal) or optional 8 (LSU 4.9
Fast Heat).
 Click ESC, then click Calibration
Number and enter the number as
explained on screen.
 Click ESC, then click Quick Lambda
MODE and enter the number as
explained on screen.
3. On the Adjust menu, click Auxiliary
Output Functions
 Click Auxiliary Out #X - choose the
number of the output that has the
sensor heater connected.
 Enter 9 (Lambda Sensor Heater) and
click ESC.
 Click Parameters and enter 1 for
Lambda 1.
Repeat the configuration for a second Lambda
sensor if required (not available in M400).
Lambda versus Air Fuel Ratio
Examples of typical values.
Air Fuel Ratio
Lambda
0.70 10.3 4.5 6.8 10.2 10.9
0.75 11.0 4.8 7.3 10.9 11.6
0.80 11.8 5.1 7.8 11.6 12.4
0.85 12.5 5.4 8.3 12.3 13.2
0.90 13.2 5.8 8.8 13.1 14.0
0.95 14.0 6.1 9.3 13.8 14.7
1.00 14.7 6.4 9.8 14.5 15.5
1.05 15.4 6.7 10.3 15.2 16.3
1.10 16.2 7.0 10.8 16.0 17.1
1.15 16.9 7.4 11.2 16.7 17.8
1.20 17.6 7.7 11.7 17.4 18.6
1.25 18.4 8.0 12.2 18.1 19.4
1.30 19.1 8.3 12.7 18.9 20.2
1.35 19.8 8.6 13.2 19.6 20.9
1.40 20.6 9.0 13.7 20.3 21.7
1.45 21.3 9.3 14.2 21.0 22.5
1.50 22.1 9.6 14.7 21.8 23.3
1.55 22.8 9.9 15.1 22.5 24.0
1.60 23.5 10.2 15.6 23.2 24.8
Me
thanol
LPG
Diesel
E85
blen
d
Gasoline PRODUCT
DATASHEET
#57006 rev 2.0
MoTeC Pty. Ltd, 121 Merrindale Drive, Croydon South, Victoria 3136, Australia
www.motec.com, Ph 61 3 9761 5050, Fax 61 3 9761 5051, support@motec.com.au
Connector and Pinout
Connecting to a ‘hundred series’ ECU
6 pin connector
Mating connector #64010
Pin no Name Colour
1 Ip Red
2 Sensor 0 V Yellow
3 Heater – White
4 Heater + Grey
5 Ipr
6 Vs Black
Lambda
sensor ‘Hundred series’ ECU
Pin Name M400/M600/
M800 Pin
M880
Pin Name
1 Ip B_26 60 LA1–P
2 Sensor 0 V B_16 27 0V–ENG
3 Heater –
A_1, A_18,
A_23, A_24,
A_31, A_32,
A_33, A_34
8, 9, 43,
51, 58, 59,
65, 64
Any Aux
4 Heater + A_26 23, 32, 41 VBAT
5 Ipr NC NC NC
6 Vs B_25 54 LA1–S
When connecting a second Lambda sensor (not
available on M400)
1 Ip B_13 61 LA2–P
6 Vs B_12 55 LA2–S
Lambda sensor PLM
Pin Name Pin Name
1 Ip M_9 Ipr
2 Sensor 0 V M_5 Common
3 Heater – M_7 Heater -
4 Heater + M_2 Heater +
5 Ipr M_4 Ip
6 Vs M_8 Vs
Connecting to a PLM MoTeC Pty. Ltd, 121 Merrindale Drive, Croydon South, Victoria 3136, Australia
www.motec.com, Ph 61 3 9761 5050, Fax 61 3 9761 5051, support@motec.com.au
Product specifications are subject to change PRODUCT
DATASHEET
#57006 rev 2.0
MoTeC Pty. Ltd, 121 Merrindale Drive, Croydon South, Victoria 3136, Australia
www.motec.com, Ph 61 3 9761 5050, Fax 61 3 9761 5051, support@motec.com.au
Lambda Sensor Installation
Note: The Lambda sensors are factory
calibrated with a trimming resistor embedded
in the sensor connector. If this connector is
cut off and replaced the sensor will require a
free air calibration.
The Lambda sensor should be fitted to the
exhaust system with the sensor tip protruding
into the exhaust gas flow.
Considerations when fitting a sensor:
 Place the sensor on an angle between 10
and 90 degrees to the vertical with the tip of
the sensor pointing down to prevent
condensation build up between the sensor
case and the sensor ceramic.
 Do not place the sensor in a vertical
position; excess heat soak will prevent
proper operation.
 Place the sensor at least 1 meter from the
exhaust ports to avoid excessive heat
(recommended).
 Place the sensor at least 1 meter from the
open end of the exhaust system to avoid
incorrect readings due to outside oxygen
(recommended).
 Place the sensor away from the flame front
coming out of the cylinder head and away
from areas where one cylinder may have
more effect than another.
 If possible, do not place the sensor near
exhaust slip joints; some designs allow air
to enter resulting in incorrect readings.
If the sensor has to be placed near a slip
joint, reverse the slip joints to reduce the
influence of introduced air.
Sensor Warm-up
The internal heater in the sensor is powerful
enough to allow accurate measurement when
gas temperature is at room temperature. The
sensor will take approximately 20 seconds to
heat up.
The maximum continuous operating
temperature of the sensor is 930 °C. Sensors
should not be used at higher temperatures for
a prolonged period. The sensor can be heated
to 1030 °C for a maximum of 10 minutes, but
this may reduce the accuracy.
Sensor Lifetime
Sensor lifetimes are highly dependent on
application for example the type of fuel used
and the volume of gas flow over the sensor.
Some factors that reduce sensor lifetime are:
 Contaminants such as silicon, lead, oil, etc.
(use sensor-friendly sealants)
 Thermal cycling and exposure to exhaust
fumes without any heating control active
 Incorrect placement in the exhaust that can
overheat the sensor
 Leaded fuel – substantially reduces lifetime
 Water jacketed exhaust manifolds as in
PWCs – substantially reduces lifetime
At the end of its life the sensor becomes slow
to respond and does not read rich properly.
Regular free air calibrations will maintain the
accuracy of the sensor over its lifetime.
Correct Incorrect
Introduced air No air introduced
exhaust flow
Incorrect Correct |
|
 |手机版|小黑屋|Archiver|汽车工程师之家
( 渝ICP备18012993号-1 )
|手机版|小黑屋|Archiver|汽车工程师之家
( 渝ICP备18012993号-1 ) 深度剖析 2019-2020 概念车设计趋势
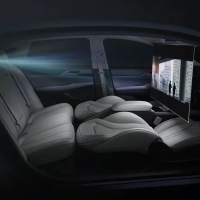 智能座舱演进的思考


 发表于 11-12-2015 11:05:21
 提升卡
提升卡 置顶卡
置顶卡 沉默卡
沉默卡 喧嚣卡
喧嚣卡 变色卡
变色卡 显身卡
显身卡
 IP卡
IP卡 狗仔卡
狗仔卡 楼主
楼主